ND Filter Options for DSLR Production
I’ve been looking into ND (neutral density) filtering options for DSLR cameras recently. There’s a lot of information out there, but finding a definitive conclusion is much more elusive.
ND filters can be used for creative effect in still photography, but my main interest in them is for video. In order to have control over the aperture and the shutter speed while shooting video, we need ND filters to cut out light to properly expose the image.
Options
There are two main options when it comes to ND filters:
- Standard filters with specific densities
- A variable ND filter
As usual, each options have their advantages and disadvantages
Standard Filters
Standard filters have been around forever. You get one filter with one density. If you need to cut out more light, you add another filter.
Advantages
- Simple— Just add ND filters until you cut out enough light
- Precise— ND filters are rated by the amount of light they cut out. You can basically calculate the amount of light you want to cut out and layer the filters that add up to the desired density.
Disadvantages
- Multiple filters to manage— I would rather be focusing on shooting than fiddling around a bunch of filters.
- Cost— A “cheap” set of ND filters of different densities can start at about $70, while a single high quality ND filter can start at $40 and easily cost $100-200 per filterl
- Flexibility— While using multiple ND filters can be very precise in that you know exactly how much light you’re cutting out, you are limited by the combination of ND filters that you have. You may have to cut out more or less light than desired and have to compensate with shutter speed or aperature, neither of which is ideal.
Variable ND Filter
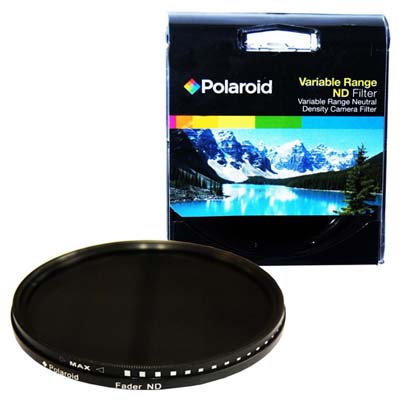
A variable ND filter is different from standard ND filters in that it is a single filter than can vary the amount of light that it cuts out. Turn a ring to the desired density to properly expose the image and shoot.
Advantages
- Single filter— Just one filter to keep track of and one filter to put on the camera.
- Simple— Turn the dial on the filter and the density changes. It’s like magic (but it’s not…probably)!
- Flexible— A variable ND filter generally provides about 8 stops of light reduction and can adjust to pretty much anything in between. As long as you don’t need to cut out more than 8 stops of light, you’ll be able to dial in the amount of ND you need.
Disadvantages
- Cost— Singh-Ray’s Vari-ND, the gold standard of variable ND filters (and the first one I heard about many years ago) is about $400. That’s more expensive than many of the lenses that you’d be using the filter on and is approaching the cost of entry level DSLR cameras!
- Quality control— The market is being flooded with cheap knock-offs (just search “fader nd” on eBay). Unfortuantely, these cheap variable ND filters often tend to add a color cast to the image and/or soften the image quite a bit.
Which Door Will It Be?
Since I’ve worked with standard ND filters for a long time in the TV/film industry and am fairly familiar with their results, I’ve decided that I’m going to satisfy my curiousity and get a variable ND filter. Thankfully, more affordable options have come onto the market recently that also appear to yield good results. For example, Lightcraft Workshop’s (LCW) Fader ND goes for $125 (for the 77mm version) and performed on par with Sing-Ray’s $390 Vari-ND filter when tested by fxguide.

Finally, a Polaroid-branded variable ND filter has also recently been released. Priced between $30-45 (depending on filter size), it’s the cheapest option by a known brand, making it a very tempting option for my first foray into the world of variable ND filters. Then again, should I really be putting a lot of confidence in filter from a brand that was based on blurry pictures?
Even though the price has come down quite a bit, I’d still recommend getting a ND filter at least as large as your largest lens. That way, you’ll be able to use the filter on any of your lenses by purchasing a simple step up ring for your various lens sizes for around $5 each. I’m probably going for the largest size (77mm), so that I’ll be set no matter what lenses I use now or in the future.