How to Organize Posts in Sections in WordPress with Cornerstone
WordPress is the best web publishing platform out there, but using it for sites that go beyond blogging has historically required hacks and workarounds. If you’ve ever wanted to organize your posts into different sections, this tutorial shows how quick and simple it can be with Cornerstone.
WordPress is great for blogging— displaying sequential pages of chronologically-ordered posts. That’s what it was built for. But what if you want to build a site with other sections as well— a site with structure?
Pages
Sure, you could simply use Pages in WordPress for all of the site’s content, and in fact this works quite well for small sites. However, solely using Pages for content-heavy (e.g. articles, tutorials, haikus, etc.) websites is not ideal as you lose many of the benefits of Posts (tags, categories, excerpts, etc.) for the content on your site.
The Category Hack
One of the most common workarounds is to use categories to create the illusion of a structure for your site. Categories can be hierarchically organized, and you can include a link to a category archive page in your navigation so that it looks like it’s an actual section on the site and the archive page will list all posts in that category. Simple? Yes. Asking for trouble? Definitely. Take a look at why using categories for a site’s structure is a bad idea.
Enter Cornerstone
Cornerstone is a plugin for WordPress that combines the best of both worlds by letting you use Pages to create the site’s structure (sections, sub-sections, etc.), and use Posts to fill those sections with content. Regardless of the site of your site, Cornerstone makes managing your sections and content very easy.
1. Create Site Structure
In WordPress, pages can be thought of as sections. They are what gives a site its structure. You can create as complex of a structure as you desire with any number of sections and sub-sections. If you need a refresher, read WordPress’ documentation on using Pages.
2. Add Posts to Sections
With the site’s structure set up, we can now move on to filling the sections with content. For this, we’ll use posts, WordPress’ bread and butter.
The procedure for creating a post has not changed. If you need a hand, read WordPress’ documentation on creating Posts.
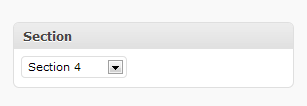
Before publishing the post as usual, there is one additional step. In the sidebar, there is a module called “Section” that contains a list of the sections (aka pages) on the site. As you may have already surmised, adding a post to a section is accomplished by selecting a section from this list.
Once you’ve done that, publish the post.

Section Module
You’ve just added a post to a section! Simple, right?
3. Display the Posts in a Section
We’re nearly done. We have sections and we have posts in sections. The next step is to display the section’s posts when a user navigates to that section. This too, is incredibly simple.
Displaying a section’s posts is accomplished by using “the loop”. The loop is used in WordPress theme wherever posts are displayed. Displaying posts in sections then, is as simple as adding the loop to the page template. Check out the documentation on using the loop in WordPress if you need a quick refresher.
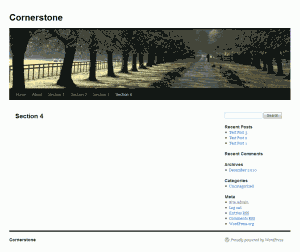
Here’s how our section looks when viewed by default
In a text editor, open your theme’s page.php file and select a point in the template where you want the section’s posts to be displayed.
The loop is generally started with the following code:
<?php if ( have_posts() ) : while ( have_posts() ) : the_post(); ?>
For working with a section’s posts, we’re going to use a couple different functions in place of the default ones:
<?php if ( cnr_have_children() ) : while ( cnr_have_children() ) : cnr_next_child(); ?>
Now that we’re in the loop, displaying the post’s content is exactly the same as with any other template in the theme. You can use template tags such as the_title(), the_excerpt(), etc.
Here’s an example loop that displays the title and an excerpt with a link for each post in the section.
<?php if ( cnr_have_children() ) : while ( cnr_have_children() ) : cnr_next_child(); ?>
<h3><?php the_title(); ?></h3>
<div><?php the_excerpt(); ?></div>
<?php endwhile; endif; ?>
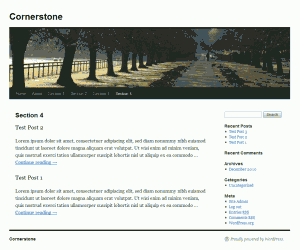
Save the template file and refresh the page in your browser to see the posts in that section.
This is a simple example, but since you have full access to all of WordPress’ template tags, there really is no limit to how you can display a section’s posts.
4. Change Permalink Structure
This is the final step. It’s an optional one, but highly recommended since it strengthens the relationship between sections and their posts, and makes URIs logical throughout the site.
- In the Administration Panel, Go to
Settings > Permalinks - Under “Common Settings”, select the “Structured” permalink structure
- Save changes
That’s it! Now all post permalinks will clearly show the relationship between posts and their sections (e.g. /section-name/post-name/) as well as the position of posts in the site’s overall structure.
Cornerstone includes several other enhancements that make managing your content in WordPress easier and more flexible. We’ll cover these in future tutorials, but for now, have fun with the ability to organize posts in sections and use WordPress to make the site you always wanted!

